Arcade Artwork
Cheyenne Sideart Scan Arrives!
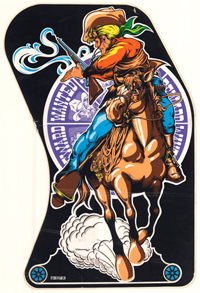
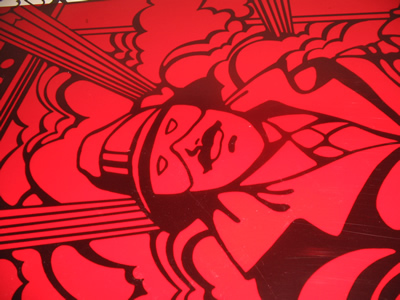
On Saturday I got a disk in the mail of the 600DPI scan of the NOS Cheyenne sideart that will be reproduced by This Old Game. There has been a lot of talk about this rare NOS piece of Exidy artwork at the Klov forums and who can make the most accurate reproductions. (more…)
Donkey Kong 2 Marquee Films
For the legion of you out there who are really excited about Donkey Kong 2 and the complete “Make Your Own” artwork package being offered by This Old Game, here is a look at some of the initial films for the printing progress for the marquee. (more…)
Moon Patrol Bezel Reproduction Update
Spoke with This Old Game (Rich) tonight. Early in 2008 Rich had sent out material samples of the chosen tinted plexi to Jamie at Noiselandarcade as well as samples of the screened colors. It sounds like Jamie approved all of the samples and sent them back. (more…)
New (old) White Mr. Do! Mention
Was online talking to g3n3r1c (Klov forums) tonight about reproduction artwork and he mentioned that he used to work for an auction house in Royal Oak called SkyRocket Amusements. Not only did 200+ games come through per week, he said that he saw one of the white Mr. Do!’s. (more…)
Pengo Artwork Pantone Colors
Today I took my Pengo bezel to a local print shop and make an attempt at matching the colors. I feel like I am lucky, because my bezel doesn’t look like it has much fading at all. The vibrant colors in Pengo and the Sno Bees were a little easier to match, the blues were a little more difficult.
These are the pantone colors I ended up with from the pantone coated palette book. (more…)
Pengo Bezel Artwork Update
It’s been awhile. There is still a lot to do on the Pengo artwork package before it can be printed, lots of small details.
The first of those details I wanted to tackle tonight was the inside flaps of the cardboard Pengo bezel. On Mr. Do!’s Pengo Bezel scan that I am using to base my vector artwork, the inside flaps were left pointing backwards. This makes sense, the bezel was going to be cleaned up and used for Mame purposes. But to reproduce proper bezel artwork, we need every little piece and don’t want to make any part of those ice mountains up.
So, in four pieces, I scanned my Pengo bezel flap corners. Here is the original bezel scan;
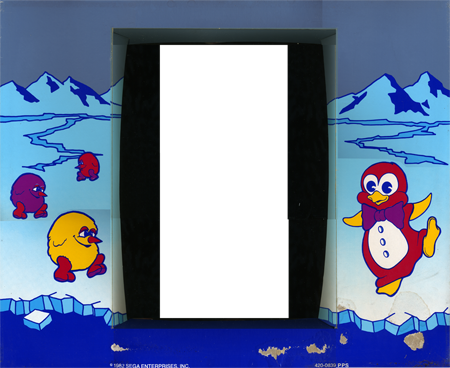
And here is the original Pengo bezel with those scanned corners added;
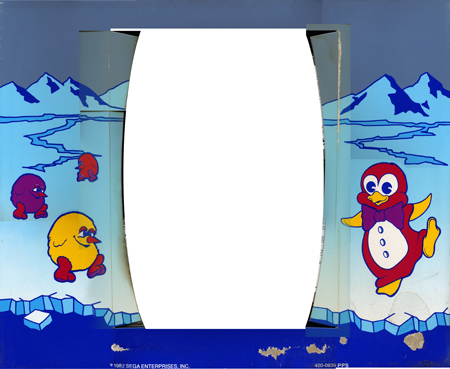
It took me another little bit to adjust the artwork and add those pieces in. Here is the Pengo bezel looking more finalized all the time;
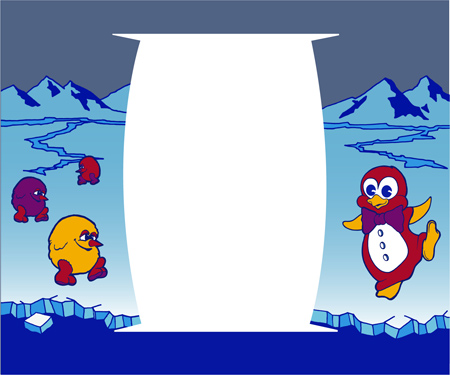
What’s next on the Pengo Bezel?
I need to renew my conversation with Rich about how to achieve the half tone pattern / gradient in on the cardboard print. How do I prep that for print? Do I make up the dot pattern myself, or is there some sort of specific process?
I also need to try some color matching. I will take the Pengo bezel into work next week and see if I can use the Pantone book next door to approximate those colors. Here are the PMS (Pantone) colors I came up with after I finished color matching the Pengo Bezel.
In December, I wasn’t aware that each piece of vector artwork needed to have a small amount of bleed added. I need to go back and add a bleed to this piece of artwork, and every other piece I have done, including the marquees, control panel overlays, and sideart. Part of the reason why I haven’t done anything:) Lots of little witty sno bitty details to finalize.
Thanks all for the continued interest. Taking Graduate classes makes vectorizing and taking on reproduction projects difficult. Especially ones done for love and not money.
Agent X Color Screens
This week, Rich at This Old Game gave me a few moments of his time and sent me some photos of the screen printing process of the in progress Atari Agent X sideart. A short history here, back in September of 2007, This Old Game announced that they would be producing a full kit of artwork including cabinet plans to build authentic artwork covered Atari Agent X cabinets. Well known arcade enthusiast Rick Ford was the catalyst, wanting a cabinet for himself, and making arrangements with both Scott Evans to get the original Atari films and me to remake the kickplate as a vector artwork file.
Fast forward to today, February 2008. Rich is in the process of printing the sideart, paying close attention to costing. Side art is challenging to reproduce and still be competitive in the small industry that is the arcade reproduction artwork business. There are a number of reasons why reproduction artwork is costly, mostly dealing with demand in relation to cost of production and cost of technology to print oversize films.
Here we see a couple of photos of the detailed Agent X side artwork. (Click on the photos for larger views)
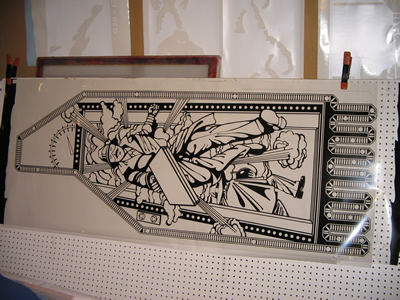
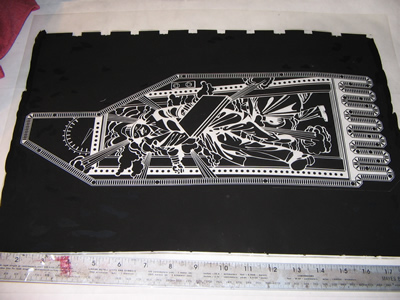
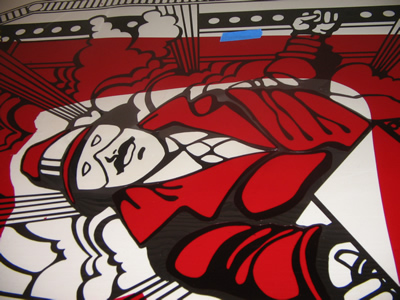
The first is a photo of the Agent X sideart film from Scott Evans, you can see the blacks look like they are printed on a clear acetate. This negative image film will be used to burn screens to print the different colors. Now, keep in mind, there are six colors in total (green, orange, blue, yellow, grey & of course black) that would be printed on a white vinyl. The films here are scaled down to 11 x 17, effectively one fourth the actual size. They will then be blown up to full size sideart at a height of six feet.
Each of the five Agent X films would have cost at least $100 to burn at those dimensions, not to mention, there are some discrepancies between the original film and the final artwork that was printed on the limited existing Agent X machines. Here is a PDF demonstrating some of those inconsistencies in color, and here is the topic on Klov with some of the members talking about whether to leave the film original or correct the color errors. The final machines indicated that Atari would have had made adjustments to the film to change the colors midway through production.
In an effort to keep the artwork more affordable, the two Rich’s decided to not burn individual films and instead implement some masking with Rubylith. What is Rubylith you ask? Well, I actually asked that myself.
Rubylith was started originally as a brand of masking film, invented and trademarked by Ulano Corporation. But over time the brand became so generalized it became synonymous with masking, much like Kleenex are to tissues. Here is how Wikipedia explains Rubylith;
Rubylith consists of two films sandwiched together. The bottom layer is a clear polyester backing sheet. The top layer is a translucent, red coloured, self adhesive, emulsion. It is designed to be both easy to cut with a knife and light safe for use with orthochromatic films.
Instead of making films for each color, Rich will apply each color individually, masking off the one full size film for each run of the six colors. Take a look at the two photos below for a demonstration.
First he covers the whole film in the Rubylith, and then he uses a pattern to identify which sections to retain for the color he is printing and which sections to cut and remove. In this case, he is making the film for the green. (This is a test piece, if it was the real film, could you identify a incorrectly cut away piece of rubylith based on the sideart colors?) The film with the clear acetate is then placed on a screen, covered in light sensitive emulsion and any area that is not covered in rubylith is exposed and burned into the screen. The areas with Rubylith are blocked and the emulsion just washes away.
All of the pre-ordered artwork will be printed in this way. One color is printed on all of the vinyl pieces, then clean off the film and start all over again with a full covering of rubylith, remove and retain pieces of mask to achieve each of the other four colors other than black.
Rubylith can also be implemented for spot fixes and spot colors. Using it’s masking abilities and sensitivities to particular spectrums of light (Red, Green, and Blue), you can go back to already printed artwork and add back in missing colors or fix errors in the print. Here are a couple of examples.
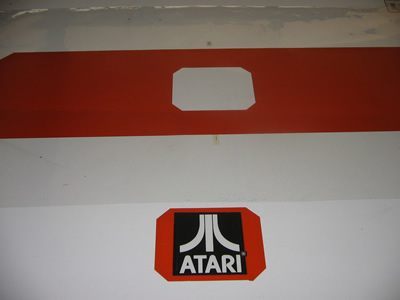
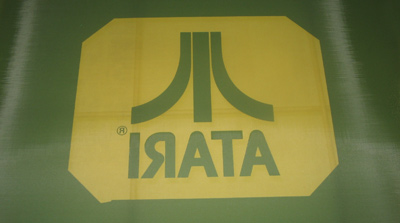
Here we see the speaker grill rubylith cutout with the Atari logo. Neither the rubylith or the black will be exposed on the screen. This is the screen for the middle red of the speaker grill overlay.
Here is the exposed film. Cut by hand, you can see the little bump in the lower left corner that can be easily fixed with a liquid filler or even a piece of tape to get a straight – but angled edge.
Again, thanks to Rich for an insight into the printing process. Hopefully he’ll continue to have a few minutes here and there to provide more information to those of us that are interested about the progress of all of his printing jobs.
So, remember, if you don’t have a printer yet for your arcade reproductions, you will want to look up Rich at Thisoldgame.com
You got it here first, exclusive content about the Atari Agent X / Cloak and Dagger artwork films and printing progress at Rotheblog.com.

