How To: Removing Nintendo bezel retainer brackets
Over the last two months I’ve been doing some restoration work on several different Nintendo cabinets. I wanted to share this quick idea for others that may have the same question I had – how do I get the bezel retainer bracket off of a Nintendo bezel without damaging the bezel or the retainer?
What is the bezel retainer bracket?
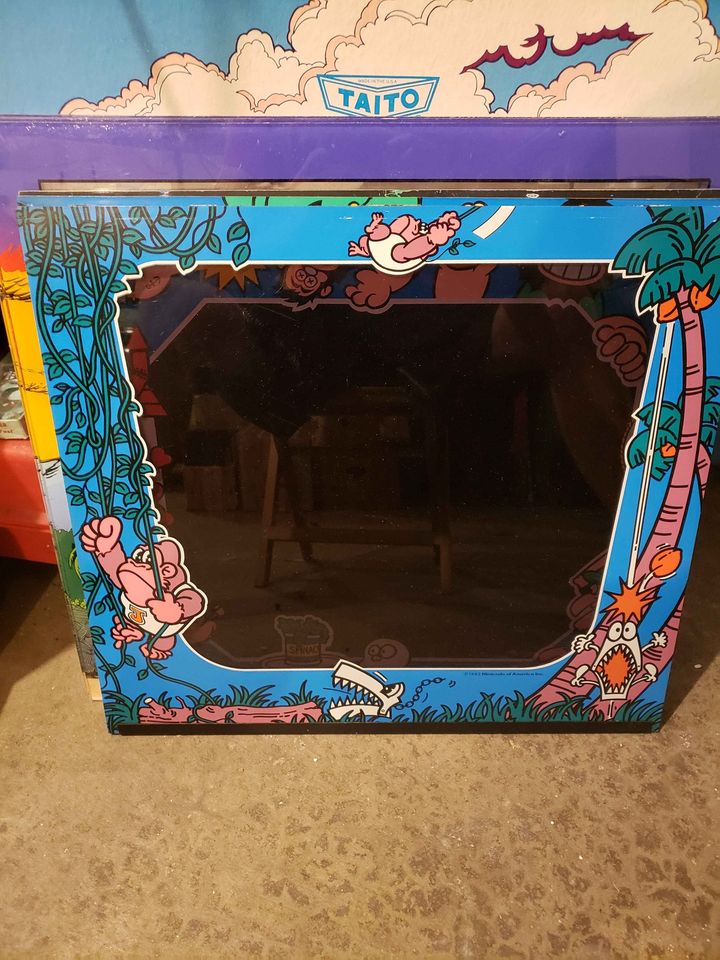
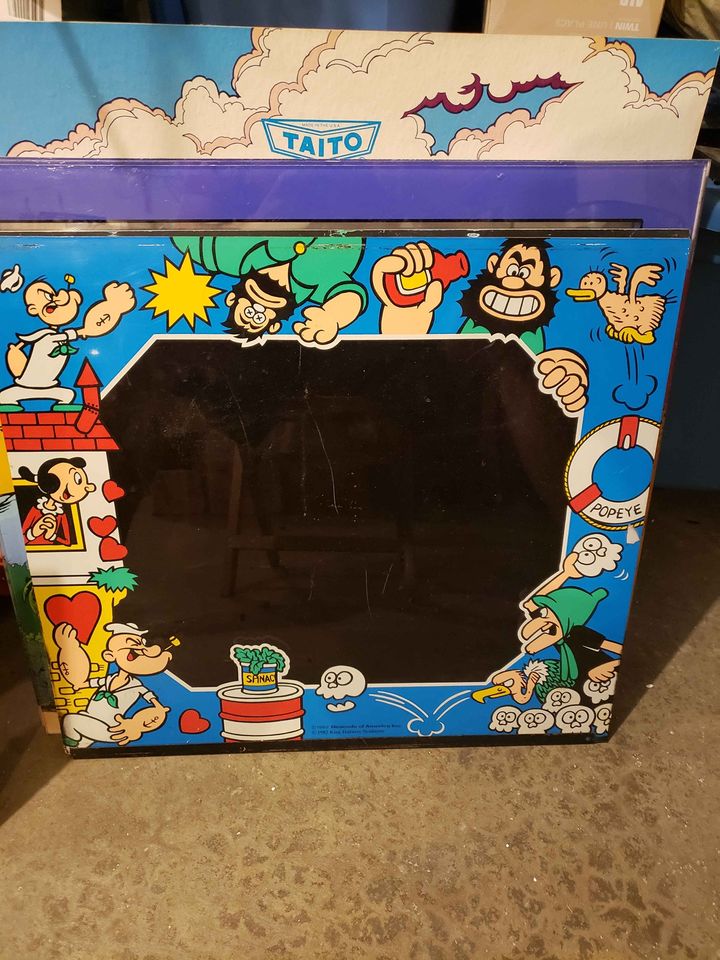
This is the metal bracket that can be found on the bottom of the bezel that gives the bezel extra rigidity in the wood channel just above the control panel for Nintendo cabinets like the Donkey Kong Family, Popeye, Mario Brothers and Punch-Out! to name just a couple. Here are a couple of photos examples – the little black bracket is what I’m referring to in this post.


One important point of clarity, as this may not seem like the case…
This bracket is just a tight, press fit onto the bottom of the bezel. Over time corrosion, sticky liquids and other grime may have made their way between the bezel and the bracket making it that much more difficult to remove.
It may seem like there is some sort of double sided tape, or fasteners that you might be missing. But there aren’t, its just a very snug press fit.
If you attempt to pry off the bracket from one side only, you will risk introducing a bend and possibly have future issues with getting the bezel out of the channel at all because it will not sit right.
Why would I remove the retainer bracket at all?
You may not need to. In my case, there was some light surface rust on the bracket that I wanted to have removed and then have the bracket powder coated. Powder Coating is really the highest quality option for restoration for durability and arguably the best looking finish.
If you are removing the bracket, its likely due to some restoration work on the bracket or bezel, or to replace the bezel outright with one in better condition but want to keep the original bracket.
How do I remove the bracket?
For these Nintendo bezels, you need to loosen the bracket and then work off sections from the plexi as evenly as you can across the entire width.
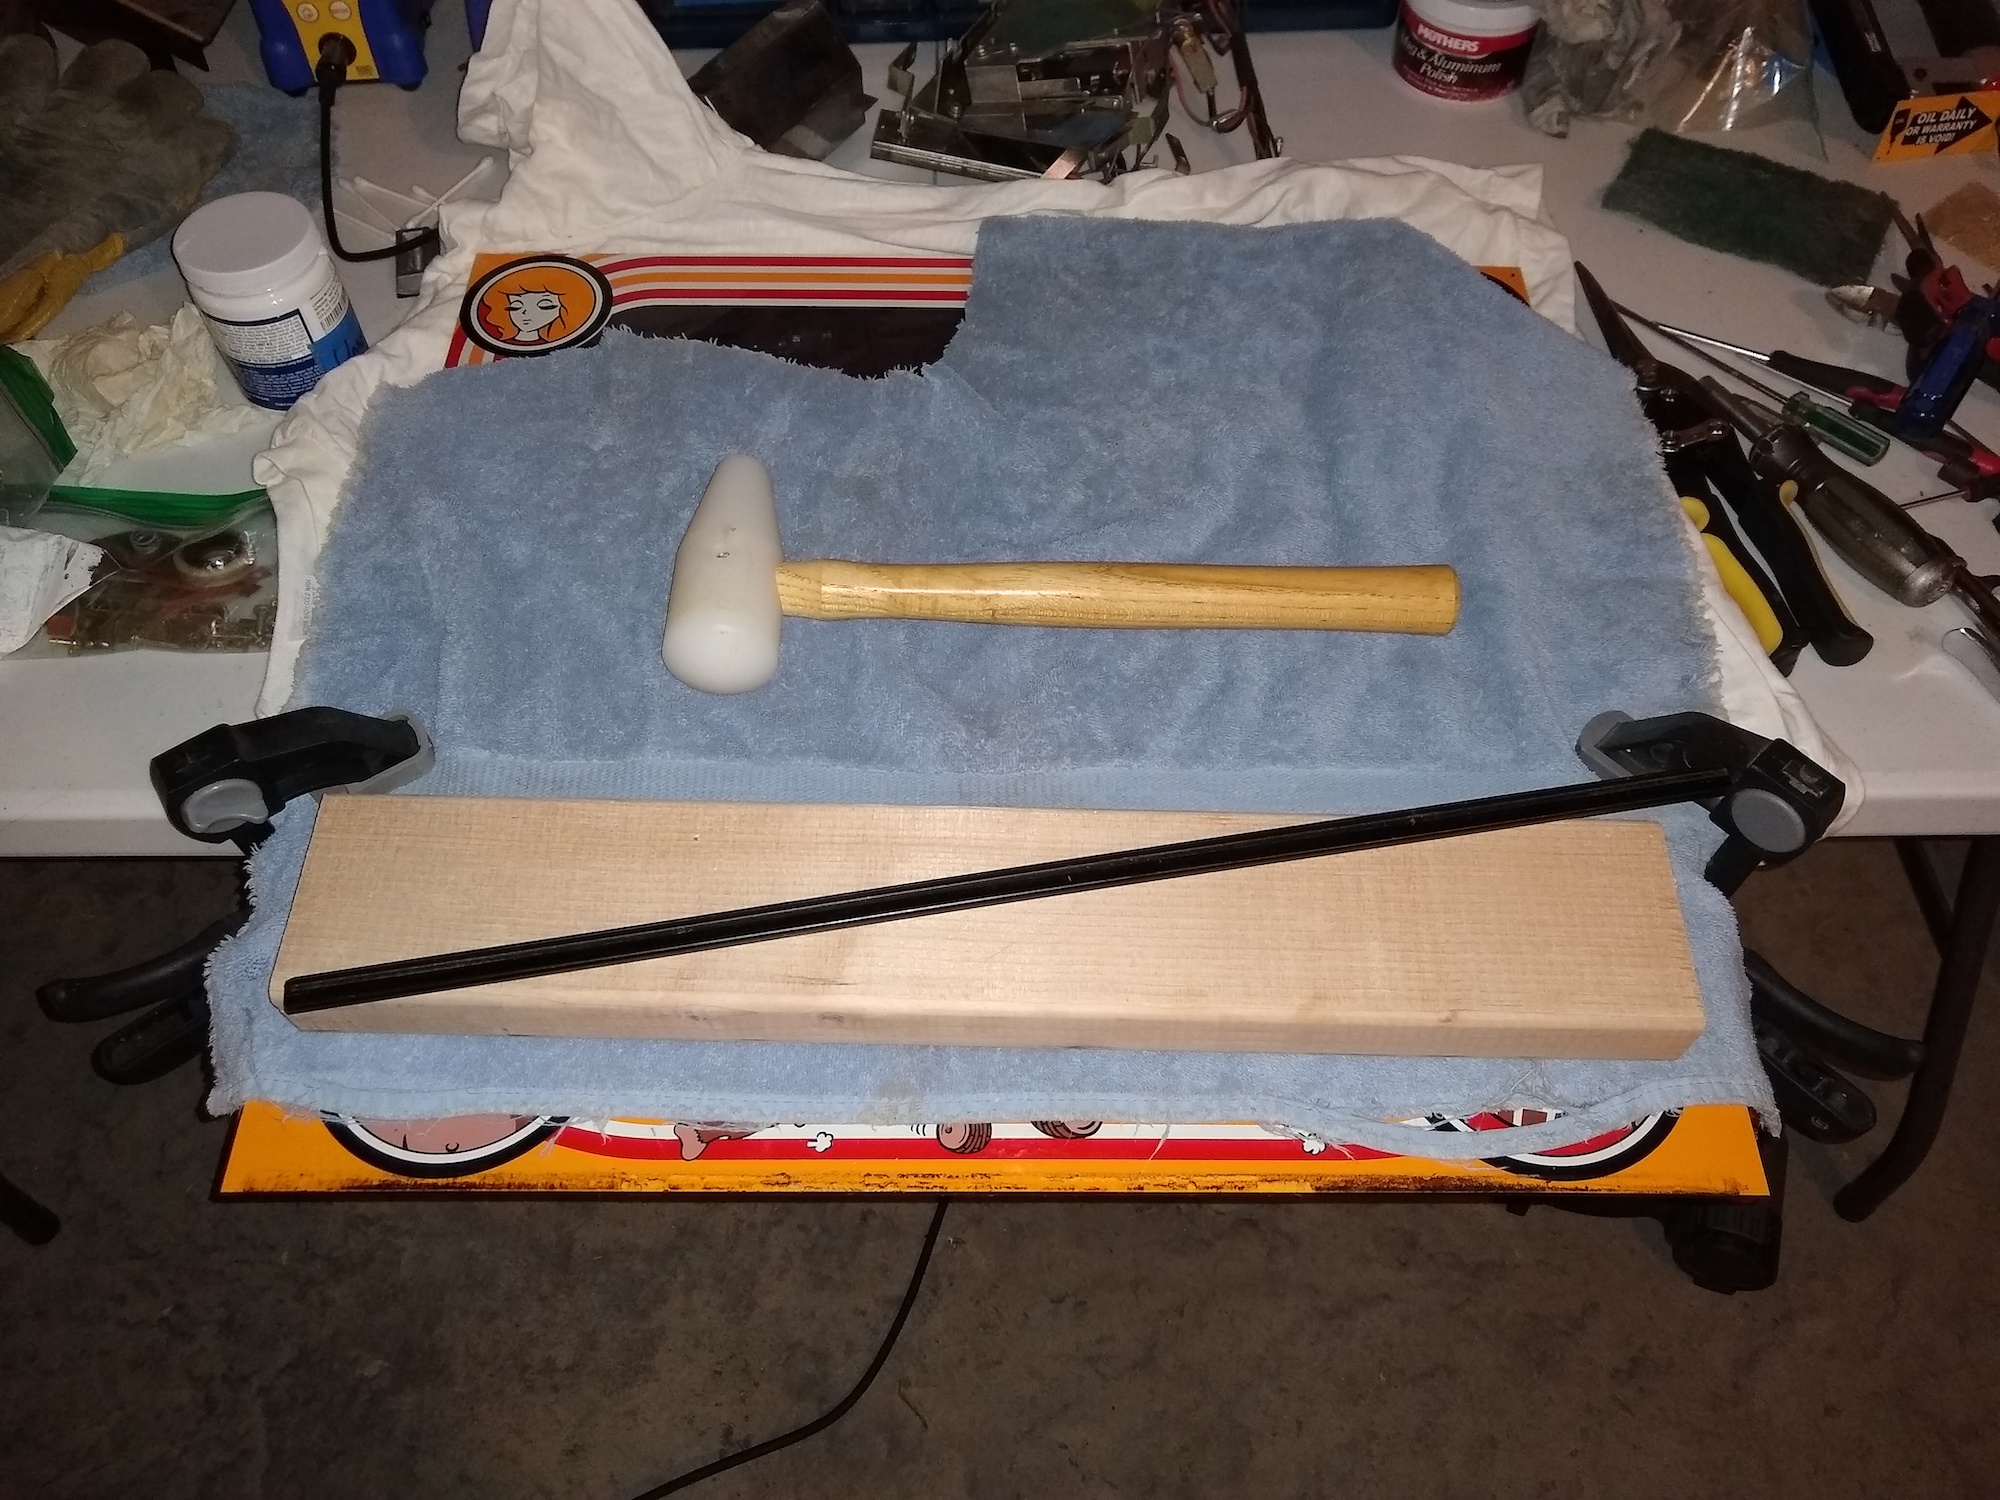
This is an instance where a picture explains things nicely.
Here is a photo of the setup I ended up using to get a bracket off a Donkey Kong bezel that worked pretty well. As you can see, this is after I successfully removed the bracket from the bezel.
A quick summary of the setup for what you see in this photo, if you can ignore the mess 🙂
* Protection for the back of the bezel on your surface
* A wood block – this helps distribute some of the force across the bezel lip
* Protection for the front of the bezel from the wood block
* Teardrop Mallet (Available at Harbor Freight) – Any mallet would probably work, but the shape of the teardrop helps a bit with a precision hit in comparison to a traditional mallet
* Clamps to keep the bezel from moving around
It only takes two to three rounds of tapping on the block and the bracket came off the bezel nicely, and without any bends.
Conclusion
Short and sweet, hope this is useful. If you have a suggestion on a better way to get this bracket off without damaging it do drop me a line.
Here are some similar arcade posts
- Popeye and Super Mario Brothers – A lucky score!
- Donkey Kong 2 Marquee Films
- Donkey Kong Arcade Game Restoration – A Photo Walkthrough
- Donkey Kong Deal in Indy
- What’s it worth? Donkey Kong Jr. Parts
If you enjoyed this post, please consider to leave a comment or subscribe to the feed and get future articles delivered to your feed reader.


Comments
No comments yet.
Leave a comment
Your email address is never displayed and cannot be spammed. If your comments are excessively self-promotional you will be banned from commenting. Read our comment privacy policy.